

Tramway SDK 0.1.1
Github
Download
Installer (win64)
Portable .zip (win64)
Starter Template
Quick links
Home
Get Started
Making Ping Pong
First of all, we will be using debug lines. Debug lines are drawn on layer 1 and up to this point we have been using layer 0, which is the default layer for RenderComponents.
By default, when calling tram.render.SetViewPosition(), it will
affect the view position in the layer 0, so for the debug lines to appear
correctly, we will need to set the view in the layer 1 as well.
	local view_pos = tram.math.DIRECTION_FORWARD * -3.0


	tram.render.SetViewPosition(view_pos, 0)

	tram.render.SetViewPosition(view_pos, 1)
Most ping pongy games are 2D, but Tramway SDK uses 3D graphics. How do we reconciliate this? The easiest way would be to just disregard the Z axis. Whenever we need to pass in a Vec3, we will set the third component to 0.0.
Let's set up the ball and the paddles.
	ball = {

	  position = tram.math.vec3(0.0, 0.0, 0.0),

	  velocity = tram.math.vec3(0.02, 0.02, 0.0)

	}


	paddle_left = {

	  position = tram.math.vec3(-2.0, 0.0, 0.0)

	}


	paddle_right = {

	  position = tram.math.vec3(2.0, 0.0, 0.0)

	}
We'll set up the playing field so that the left and right borders are on the -2.0 and 2.0 X coordinates respectively and top and bottom are on the -1.0 and 1.0 Y coordinates respectively.
The paddles will be moving along the left and the right sides of the field. The ball will start in the middle. We also give it a starting velocity.
When drawing lines using the debug line functions, we need to call these functions every frame. Up until now we have been using the Tick event handler to drive the logic. Tick events get emitted at regular intervals, but they might not be emitted for every frame. That's why we will be putting all of the rendering related code in the event handler for the Frame event.
Let's draw the field first.
	local corner1 = tram.math.vec3(-2.0, 1.0, 0.0)

	local corner2 = tram.math.vec3(2.0, 1.0, 0.0)

	local corner3 = tram.math.vec3(2.0, -1.0, 0.0)

	local corner4 = tram.math.vec3(-2.0, -1.0, 0.0)


	local midpoint1 = tram.math.vec3(0.0, 1.0, 0.0)

	local midpoint2 = tram.math.vec3(0.0, -1.0, 0.0)


	local color = tram.render.COLOR_WHITE


	tram.render.AddLine(corner1, corner2, color)

	tram.render.AddLine(corner2, corner3, color)

	tram.render.AddLine(corner3, corner4, color)

	tram.render.AddLine(corner4, corner1, color)

	tram.render.AddLine(midpoint1, midpoint2, color)
Here we just define the corners of the field and use the debug line drawing functions to draw them. Let's draw the paddles next.
	local left_top = paddle_left.position

	  + tram.math.vec3(0.1, paddle_size, 0.0)

	local left_btm = paddle_left.position

	  + tram.math.vec3(0.1, -paddle_size, 0.0)


	tram.render.AddLine(left_top, left_btm, tram.render.COLOR_GREEN)


	local right_top = paddle_right.position

	  + tram.math.vec3(-0.1, paddle_size, 0.0)

	local right_btm = paddle_right.position

	  + tram.math.vec3(-0.1, -paddle_size, 0.0)


	tram.render.AddLine(right_top, right_btm,

	  tram.render.COLOR_GREEN)
Here we just calculate the top and bottom coordinates of the paddles, then draw them. Also we push them into the field a bit, so that they don't get obscured by the lines that make up the sides of the field.
You can set the paddle_size to whatever size you want. I set it
to 0.2.
Finally, we draw the ball.
	tram.render.AddLineMarker(ball.position,

	  tram.render.COLOR_RED)
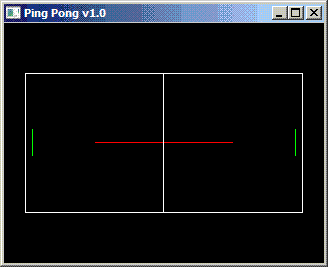
Initial field setup.
Let's add the ability to move the paddles. This we should put in the Tick event handler, since we want the paddles to move at a speed independently of the frame rate.
	if tram.ui.PollKeyboardKey(tram.ui.KEY_UP) then

	  if paddle_right.position.y

	      + paddle_size < 1.0 then

	    paddle_right.position.y =

	      paddle_right.position.y + 0.05

	  end

	end


	if tram.ui.PollKeyboardKey(tram.ui.KEY_DOWN) then

	  if paddle_right.position.y

	      - paddle_size > -1.0 then

	    paddle_right.position.y =

	      paddle_right.position.y - 0.05

	  end

	end


	if tram.ui.PollKeyboardKey(tram.ui.KEY_W) then

	  if paddle_left.position.y

	      + paddle_size < 1.0 then

	    paddle_left.position.y =

	      paddle_left.position.y + 0.05

	  end

	end


	if tram.ui.PollKeyboardKey(tram.ui.KEY_S) then

	  if paddle_left.position.y

	      - paddle_size > -1.0 then

	    paddle_left.position.y =

	      paddle_left.position.y - 0.05

	  end

	end
I set it up so that the left paddle can be moved up and down by the W and S keys respectively, and the right paddle can be moved up and down by the Up and Down arrow keys respectively.
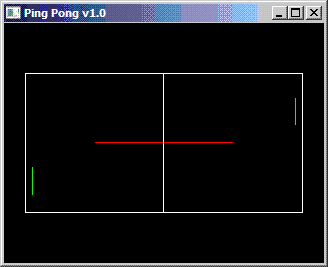
The paddles can be moved now.
Let's make the ball move as well.
ball.position = ball.position + ball.velocity
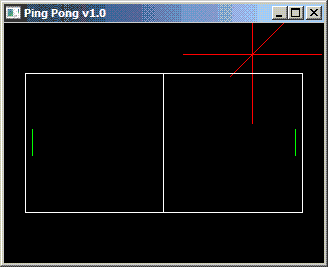
The ball flies out of the field.
Adding collisions to the top and bottom sides of the field is very easy.
	if ball.position.y < -1.0

	    or ball.position.y > 1.0 then

	  ball.velocity.y = -ball.velocity.y

	end
Adding collisons to the left and right sides is a little bit more complicated, since we also have to take into account collisions with the paddles.
	if ball.position.x < -2.0 then

	  local paddle_dist = math.abs(ball.position.y

	    - paddle_left.position.y)


	  if paddle_dist < paddle_size then

	    ball.velocity.x = -ball.velocity.x

	  else

	    ball.position.x = 0.0

	    ball.position.y = 0.0


	    player_right_score = player_right_score + 1


	    print("Left lost!!")

	    print("Score is",

	          player_left_score,

	          "|",

	          player_right_score)

	  end

	end


	if ball.position.x > 2.0 then

	  local paddle_dist = math.abs(ball.position.y

	    - paddle_right.position.y)


	  if paddle_dist < paddle_size then

	    ball.velocity.x = -ball.velocity.x

	  else

	    ball.position.x = 0.0

	    ball.position.y = 0.0


	    player_left_score = player_left_score + 1


	    print("Right lost!!")

	    print("Score is",

	          player_left_score,

	          "|",

	          player_right_score)

	  end

	end
We also need to define the player score counters for this.
	player_left_score = 0

	player_right_score = 0
At this point, the gameplay logic is finished. We just have to add the 3D models. For the ball model, I decided to use the teapot model. For the paddles I used the default Blender cube, with some bevels applied to the edges.
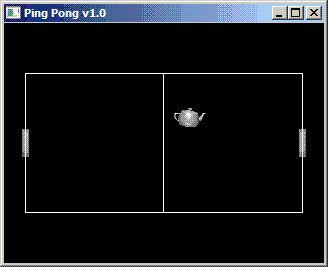
How it looks like with the 3D models replacing the debug lines.
One thing you might notice is that the 3D models are being drawn underneath the debug lines. We can fix this by setting them to a higher layer.
	paddle_model_left:SetLayer(1)

	paddle_model_right:SetLayer(1)
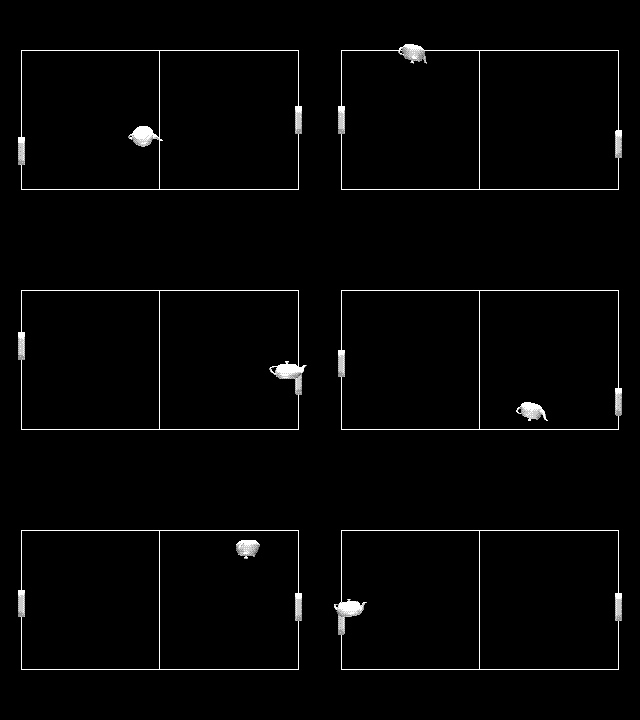
In motion.
If you want to look at the full code, it is available in the example repository.
| « Back | Home | Next » |


